Tutorial – Google Desktop Sidebar – Hello World Part 3, Adding a Property Page
Posted on December 10th, 2006
Requirements
.Net Framework SDK 1.1
Google Desktop SDK
Downloads
The zip file listed here is all inclusive of all four tutorial parts. We broke up the article into four parts for ease of reading. Included in the zip is a Word doc version of all four articles.
Download (231KB)
Purpose
In this article I intend to show you how to extend our simple Google Desktop Sidebar (GDS) component. All the source is in C# 1.1. We assume that all developers looking at this article are familiar with writing code in C# and the .Net framework. For this component we will be doing a simple Hello World type sample. We will show screenshots where appropriate. Otherwise we assume you know your way around.
What it shows
In this part of our tutorial we will be adding a property page to our component that will allow us to change the content format among the three built-in types.
Adding Property Pages
We are assuming you have kept up so far if not pull down the code from above and you can follow along or you can work through the other two parts.
Since we are going to add a property page lets start with the obvious. Add a new Windows Form file to your project. Once complete open up the code window and add the following Using statements.
using System;
using System.Drawing;
using System.Collections;
using System.ComponentModel;
using System.Windows.Forms;
using System.Runtime.InteropServices;
using Google.Base;
using Google.Base.Utils;
using GoogleDesktopAPILib; // Google Type libraries
using GoogleDesktopDisplayLib; // Google Type libraries
As you can see it is mostly the same as a windows form but we have added the google items to the mix. If you look in the GoogleBase folder you will see a base property page object. This is taken pretty much straight from the samples that google provided. What you want to do is change your form class to inherit from the base property page class. That will hookup the form so it can be used by our plug-in. Your class should look something like this:
[GuidAttribute("DFAEFC1E-2466-40d5-80D6-3FF5136627DA")] // CHANGE THIS in your plug-in
[ClassInterface(ClassInterfaceType.None)]
public class frmHelloProperties : Google.Base.PropertyPage
Notice that again just like our main plug-in class we have a GUID Attribute. Since the plug-in / GDS needs a handle to the property page we need the GUID so that COM can get a hook into it for our use. Next by marking our class with the ClassInterface attribute we can control whether or not the class is exposed via a typelib. Since this is used internally we can mark it as none.
Now once you get that done you can setup your form however you want. Just like a normal form. For this tutorial we are going to add a label and a combo box. So add them to the form and change the Label to say “Change Display Layout”. Then change your combobox to be a drop-down list. Next add the following values to the Items collection, NoWrap, Email, and News.
Next let’s get back to our code. We are going to override two methods on our property page, OnPageActivate and OnPageApply. As there names imply we will be handling code when you open the property page and when you hit the Apply or OK button.
Let’s do the Activate method first.
/// <summary>
/// Called just before the property page is displayed
/// </summary>
protected override void OnPageActivate(System.IntPtr wndParent, Rectangle Rect, bool modal)
{
  base.OnPageActivate(wndParent, Rect, modal);
  HelloWorldPlugin ctl = dataObject as HelloWorldPlugin;
  if (ctl != null)
  {
    // Get the parameter values from the plug-in
    switch (ctl.Layout)
    {
      case GoogleDesktopDisplayContentItemLayout.GDD_CONTENT_ITEM_LAYOUT_EMAIL:
         this.cboLayout.SelectedItem = "Email";
         break;
      case GoogleDesktopDisplayContentItemLayout.GDD_CONTENT_ITEM_LAYOUT_NEWS:
         this.cboLayout.SelectedItem = "News";
         break;
      case GoogleDesktopDisplayContentItemLayout.GDD_CONTENT_ITEM_LAYOUT_NOWRAP_ITEMS:
         this.cboLayout.SelectedItem = "NoWrap";
         break;
    }
  }
}
The first thing we do is let the base class do what it needs to do, then we apply our content information / changes. Each property page has a dataObject that equates to the plug-in you are using. So we need to set and cast our object to the type of our plug-in. If we have a plug-in handle then we can continue with our code. The property we have here, which we will create in just a few, is called Layout. It is of the type GoogleDesktopDisplayContentItemLayout which defines the three currently supported display formats out of the box. So what we do here is figure out what we are currently using and then set our combobox to the appropriate value.
Next lets look at the Apply process which is very similar.
/// <summary>
/// Called when user hits OK in the property page
/// </summary>
protected override void OnPageApply()
{
  HelloWorldPlugin ctl = dataObject as HelloWorldPlugin;
  if (ctl != null)
  {
    // Set the new parameter values back to the plug-in
    switch (this.cboLayout.SelectedItem.ToString())
    {
      case "NoWrap":
        ctl.Layout = GoogleDesktopDisplayContentItemLayout.GDD_CONTENT_ITEM_LAYOUT_NOWRAP_ITEMS;
        break;
      case "Email":
        ctl.Layout = GoogleDesktopDisplayContentItemLayout.GDD_CONTENT_ITEM_LAYOUT_EMAIL;
        break;
      case "News":
        ctl.Layout = GoogleDesktopDisplayContentItemLayout.GDD_CONTENT_ITEM_LAYOUT_NEWS;
        break;
    }
    ctl.GetOurStuff();
  }
  base.OnPageApply();
}
Again we get a handle to our plug-in object. However this time we do our setting of our data. Now you will also notice that we are making a direct call to the GetOurStuff method. This way we can go through and re-apply our formatting to our content items. Last but not least we call our base method so that the GDK can finish anything else it needs to.
Since we defined the layout variable in part two you should be able to just add this class. Next lets go through and hookup the property pages. To do this we need to implement the ISpecifyPropertyPages interface. It’s pretty simple and straight forward so here is the code:
public void GetPages(ref CAUUID pages)
{
  // get our guid
  Guid[] g = new Guid[1];
  g[0] = typeof(frmHelloProperties).GUID;
  pages.SetPages(g);
}
What we are doing here is getting the GUID from our property page and then setting it into the pages object provided by the GDK. It will then get the hook to the property page and display it.
Let’s go ahead and compile it and see what we have so far. When you compile your code you should hopefully get the following dialog. 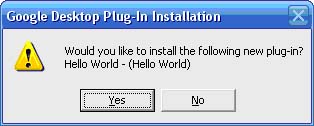
If you did not fix any errors you have and then continue. Next if you do not have the GDS running start it up.
To start you should see something like the following: 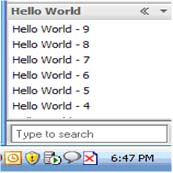
Now let’s open the property page by selecting the down arrow and choosing Options. As you will see it will show the NoWrap as the current display style. This is what we set in the constructor of our main plug-in code. Try changing it around and see how it looks.
Email View 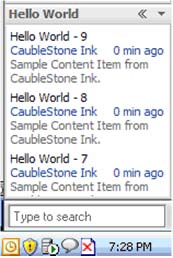
News View 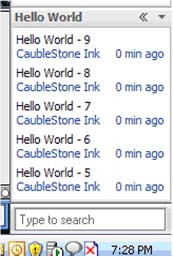
What you have learned
In this part of our tutorial you have learned how to add a property page and how to apply those changes to your plug-in. In our next part of this tutorial we will show you how to save your view layout information and restore it at run-time.