Tutorial – Google Desktop Sidebar – Hello World Part 2, A simple plug-in with Content
Posted on December 10th, 2006
Requirements
.Net Framework SDK 1.1
Google Desktop SDK
Downloads
The zip file listed here is all inclusive of all four tutorial parts. We broke up the article into four parts for ease of reading. Included in the zip is a Word doc version of all four articles.
Download (231KB)
Purpose
In this article I intend to show you how to extend our simple Google Desktop Sidebar (GDS) component. All the source is in C# 1.1. We assume that all developers looking at this article are familiar with writing code in C# and the .Net framework. For this component we will be doing a simple Hello World type sample. We will show screenshots where appropriate. Otherwise we assume you know your way around.
What it Shows
In this part of our tutorial we will be showing you how to add content items to your basic plug-in. It is assumed that you have the code from the previous article as we will be building from that base. So have it ready.
Adding Content
As stated we are now going to look at what it takes to add content items to our GDS plug-in. We are going to take the simple approach and just build a for loop that will add 10 items to the plug-in every time it’s loaded. That’s it.
So let’s get started. First add a new class file to your project from earlier and add the following using statements:
using System;
using System.Text;
using System.Windows.Forms;
using Google.Base;
// Base module to ease plug-in development
using Google.Base.Utils;
// Base module to ease plug-in development
using GoogleDesktopAPILib;
// Google Type libraries
using GoogleDesktopDisplayLib;
// Google Type libraries
As you will see this is very similar to what we had in our earlier tutorial. Now let’s add our class definition. If you want to change the class name go ahead.
public class HellowWorldCI : GoogleDesktopDisplayContentItemHelperClass, IGoogleDesktopDisplayContentItemHandler
Since this class is not created directly you do not need a GUID attribute on it. As you can see we are inheriting directly from the Helper class provided by the GDK and an Interface. Make sure you use the Class viewer to implement the interface for it.
Most everything you can pretty much leave alone. We will only show you the actual methods that we will be changing from the default implementation. As per the documentation you should throw the NotImplementedException when ever you do not implement a particular method. By doing this the underlying api will know to use the default method for handling this as per the application framework.
A lot of this block of code is taken from the samples that come with the GDK only we have cleaned it up a little bit and by breaking it into a separate file we feel that it makes it easier to understand and conceptualize what is going on.
Add the following code to the ProcessDetailsViewFeedback method:
if ((flags & GoogleDesktopDisplayDetailsViewFlags.GDD_DETAILS_VIEW_FLAG_TOOLBAR_OPEN) != 0)
{
   OpenItem();
   return;
}
if ((flags & GoogleDesktopDisplayDetailsViewFlags.GDD_DETAILS_VIEW_FLAG_NEGATIVE_FEEDBACK) != 0)
{
  MessageBox.Show("Not interesting: " + heading + "Doing default processing");
}
// throw this exception to let the default processing happen for all other
// details view commands
throw new NotImplementedException();
The OpenItem method will be defined in just a few minutes. All it will do is popup a message box. What this code does is when you are in the detail view for an item there are several processing options. You can click on the header, the Remove item, or the X in the right hand corner. By clicking on each different element you can have it do several things. In the case of an RSS feed if you click on the title it will normally take you to the web article in your current browser. If you click on the Remove Item it normally tells the interface to delete it, etc. By handling the information in this section you can have your code execute various actions depending on how you interact with it.
Next for the OnDetailsView method add the following code:
// Here we can create any ActiveX control for displaying the details, and
// return it via the detailsControl parameter. We choose the
// 'GoogleDesktopDisplayDetailsViewHelper' control that will give us a
// UI that's inline with how the sidebar looks.
GoogleDesktopDisplayDetailsViewHelperClass details = new GoogleDesktopDisplayDetailsViewHelperClass();
// set the details control's content from our own data
string text = "Hello World... How are you/r/n/r/nSome sample text/r/n/r/nwithout formatting/r/n";  details.SetContent(source, time_created, text, false, layout);
detailsControl = details;
title = heading;
flags =  GoogleDesktopDisplayDetailsViewFlags.GDD_DETAILS_VIEW_FLAG_TOOLBAR_OPEN | GoogleDesktopDisplayDetailsViewFlags.GDD_DETAILS_VIEW_FLAG_NEGATIVE_FEEDBACK;
return false;
// return false to show details view, true to cancel it.
This block of code is executed when you click on an item and it goes to open the expanded details view for an article. The base class used here as seen is the GoogleDesktopDisplayDetailsViewHelper class. This is the base class used by the API to display the standard details view. If you want to implement your own you would need to write the appropriate ActiveX control to handle this. What we are doing I this class in our case is setting the internal details for each item when opened into details view. This is not good for dynamic content but for this example it works perfect. The SetContent method will take the values of the object in question and use it for rendering the object.
Add this code for the OpenItem method:
MessageBox.Show("Open: " + this.heading);
All are doing here is that when you double click on the item it will display the heading for the item that you double-clicked on.
That pretty much does it for this class. Now we need to update the main plug-in class from Part 1. First we need to add a property to our class to handle the Layout of our content. This will play a bigger part in the later tutorials. For now let’s add this code.
public GoogleDesktopDisplayContentItemLayout Layout
{
  get { return this.layout; }
  set { this.layout = value; }
}
On our main plug-in class lets add the following method:
public void GetOurStuff()
{
  // clear our stuff out first this.
  RemoveAllContentItems();
  // setup the basic display options needed to add to object.
  GoogleDesktopContentItemDisplayOptions options =        GoogleDesktopContentItemDisplayOptions.GDD_ITEM_DISPLAY_IN_SIDEBAR |        GoogleDesktopContentItemDisplayOptions.GDD_ITEM_DISPLAY_AS_NOTIFICATION_IF_SIDEBAR_HIDDEN;
  // We are going to add 10 hello world items.

  for (int x=0; x<=9; x++)
  {
    GDP_HelloWorld.HellowWorldCI content = new HellowWorldCI();
    content.heading = "Hello World - " + x.ToString();
    content.source = "CaubleStone Ink";
    content.snippet = "Sample Content Item from CaubleStone Ink.";
    content.time_created = DateTime.UtcNow;
    content.flags = GoogleDesktopDisplayContentItemFlags.GDD_CONTENT_ITEM_FLAG_NONE;
    content.layout = this.Layout;
    this.AddContentItem(content, options);
  }
}
The first thing for this method is that we will remove all the existing items from the plug-in. Essentially clear all. In the real-world this should be dynamic but for this tutorial it allows us to recreate all the items easily. Next we set our base options in this case we tell the item that it will be displayed in the Sidebar and that if the Sidebar is set to auto-hide you will get a toast notification of the change. After that we will be adding our content. We setup the loop to add 10 items to our content page. To do that create an instance of our content class that we created earlier. Then set the heading, source, snippet, etc. For the time use the UtcNow otherwise it will not calculate the added time correctly. We have also setup a property on our main class called Layout that will retrieve our base layout. If you look at Part 1 you will see that by default it is set to the No Wrap option. This will also come into play for our Part 3 tutorial. The last and final step is to add our content item.
Next we need to modify the SetSite method so that we can call our setup method and add our content to the screen.
displaySite = (IGoogleDesktopDisplaySite)site;
// Display our content here...
if (displaySite != null)
{
    this.SetFlags(GoogleDesktopDisplayPluginFlags.GDD_PLUGIN_FLAG_NONE,
                GoogleDesktopDisplayContentFlags.GDD_CONTENT_FLAG_HAVE_DETAILS);
  this.GetOurStuff();
}
What we have added is the IF condition and it’s contents. The first thing we do is set the flags on the plug-in to tell it that "Hey we have content here that needs to be displayed". After that we call our GetOurStuff method. If you do not add the flags the content will not be displayed.
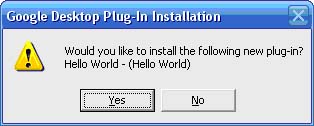
Ok it’s now time to compile and test. If you get the following screen that’s good, if not adjust your errors until it compiles. This is what you should see.
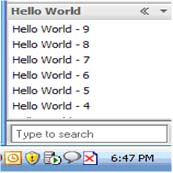
Once you click yes open your GDS unless it is already open. You should see something like the screen below.
What we learned
In this part of our tutorial we have walked you through the process of adding content items to your component. You have seen how you can add individual items, remove those items, and the different changes needed in order to add it to your plug-in.